Tilemap Guide
Here's a basic guide on how TinySwords tilesets work. I hope it will help clarify any questions you may have about their use.
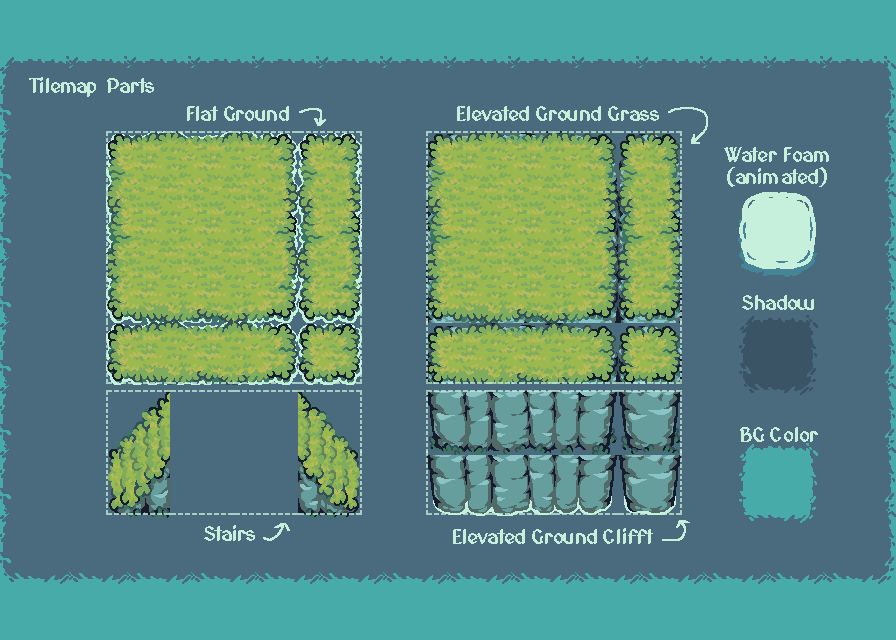
Tilemap Parts: Below you will find the different parts of the tileset. Flat Ground is the lowest terrain next to the water. Elevated Ground is the raised terrain that contains two cliffs, one facing the terrain below it and the other directly facing the water. Stairs are the path that connect any lower terrain to the upper terrain. Water Foam are the waves that make contact with any terrain that touches the water. Shadow is the sprite that will add depth to each elevated layer above. BG Color is the background color that will be used to fill all the extra space in the project. The project tile size is 64x64.
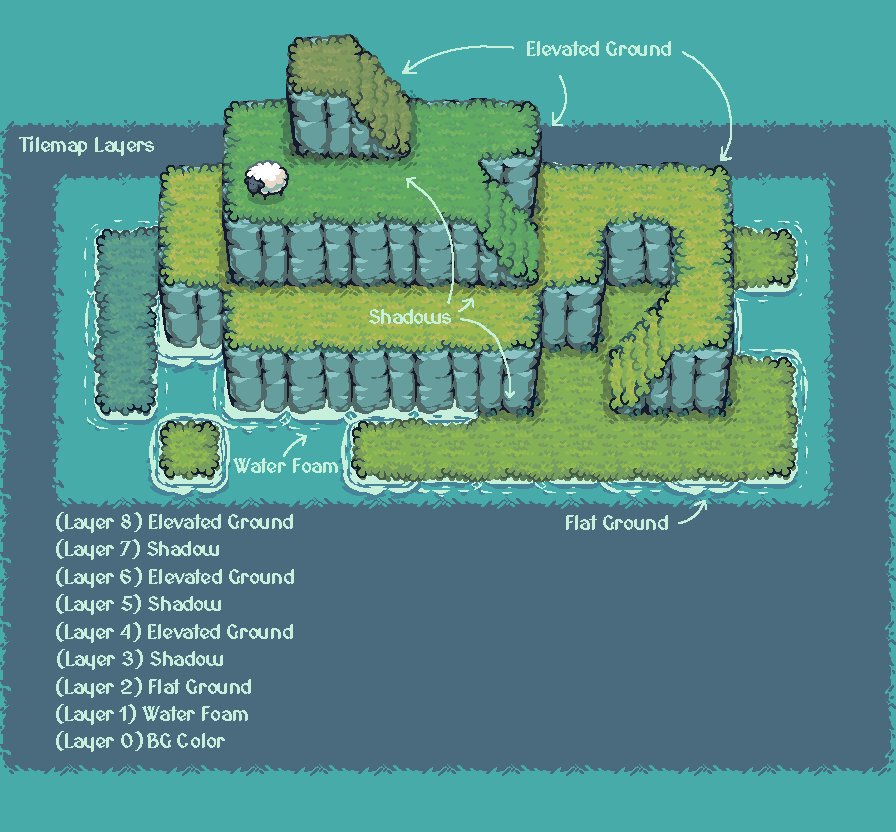
Tilemap Layers: The project layers will be organized in this way. First would be the BG Color, then Water Foam, and the first terrain layer Flat Ground. After this, the Shadow and Elevated Ground layers will be repeated over and over again depending on how many elevation levels you want to add. Use different terrain colors in any order to make the different elevation layers more noticable.
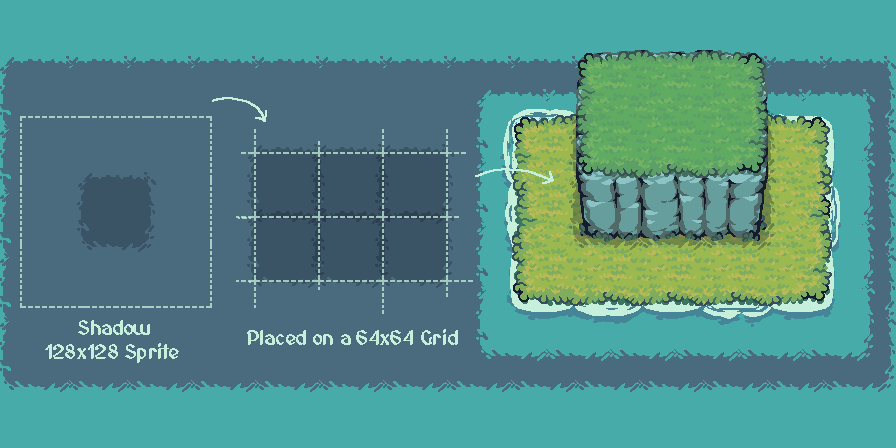
Shadow: The Shadow sprite is 128x128, but you will place it on a 64x64 tile size as the rest of the regular tiles. This is so you can overlap the edges and create an effect like is shown in the example bellow. Keep in mind that the Shadow sprites are going to be placed below the same area as the walkable part of the Elevated Ground, but to create the illusion of height, it is moved completely one 64x64 pixel square downwards.
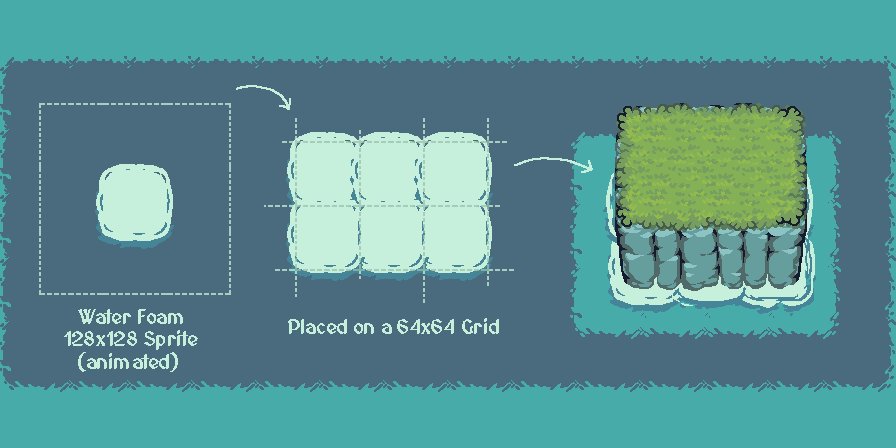
Water Foam: This is an animated sprite that works with the same configurations as the Shadows. It is placed in all area that touches the BG Color (water). To make it look more natural, make that all different Water Foam sprites start the animation at a different frame.
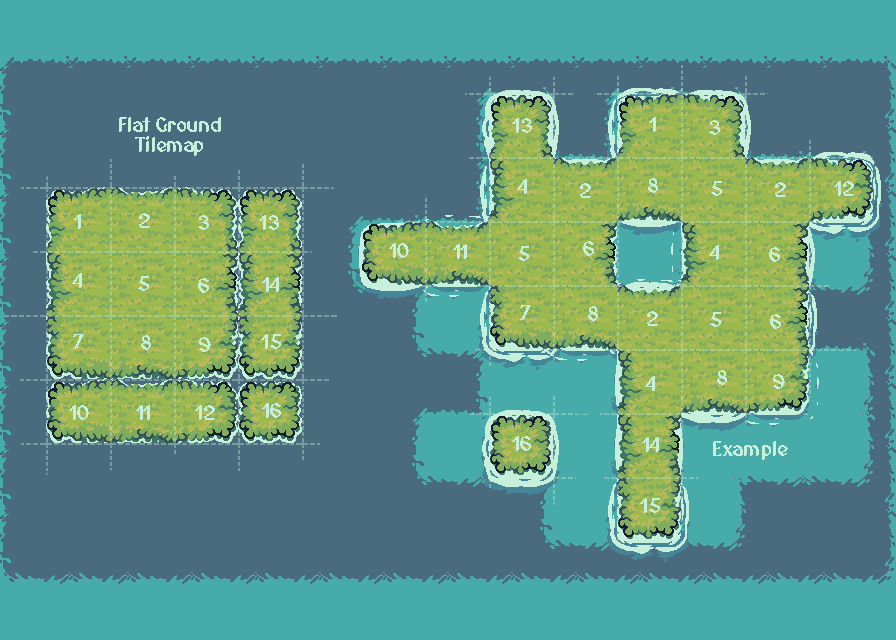
Flat Ground: This is the lowest terrain next to the water. Here's an example that uses all the pieces of the tilemap, which you can use as a guide to see which piece is used in each situation.
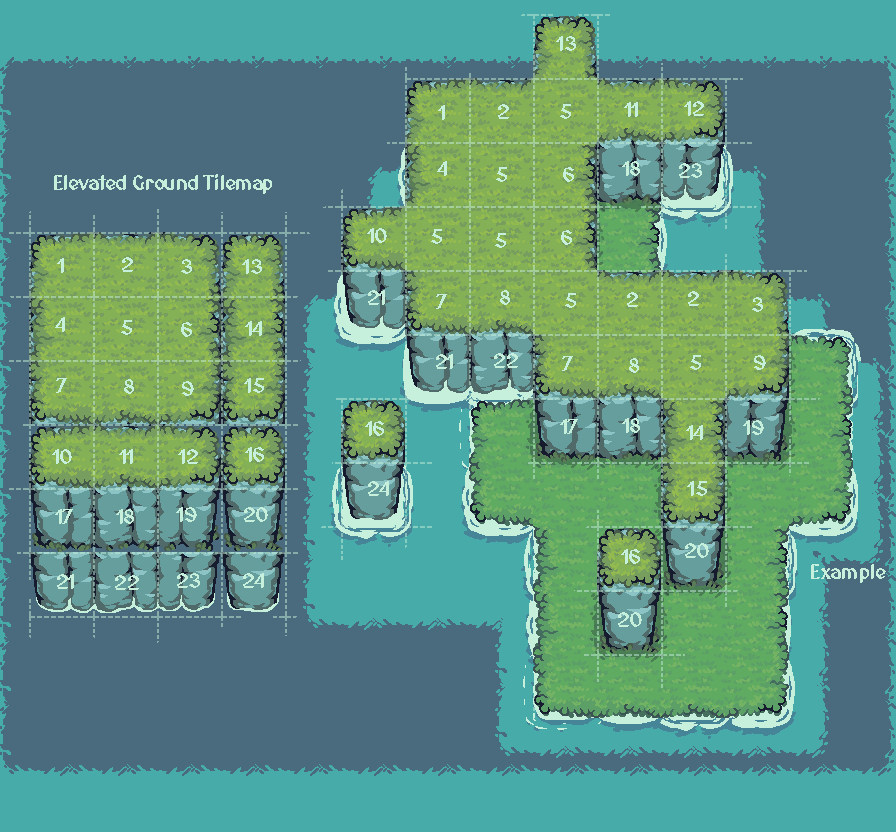
Elevated Gound: The upper part of the Elevated Ground works exactly the same as the Flat Ground. But we also have the Cliff sections that connect to the terrain below. Note that there are two main differences, one cliff connects to the water, the other to the walkable terrain below.
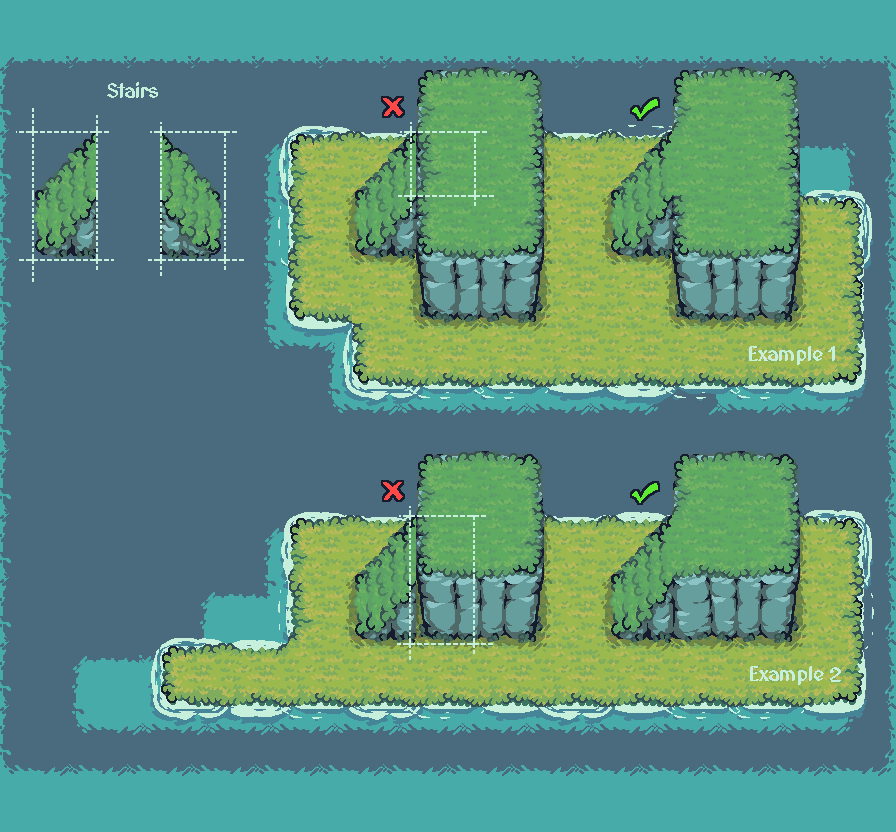
Stairs: The Stairs will connect to any Elevated Ground area. If the stairs are next to a walkable area and not a Cliff, only one Elevated Ground center piece will be used to connect them at the top (Example 1). But if the Stair are next to a Cliff, then you will use two pieces: one to connect the walkable top part of the Elevated Ground, and another to connect the bottom part of the Cliff (Example 2).
I hope this is helpful, but if you still have any questions about how to use them, please leave them in the comment section below.
Have fun :)
Comments
Log in with itch.io to leave a comment.
That is amazingly useful. I wish more designers provided something like this!